Subject:
The steps here describe how to display the Quantity Available per Site in the SmartFill Make a Selection window.
Resolution:
These are the steps to follow:
-
- Go to Microsoft Dynamics GP | Tools | Setup | SmartFill | Objects.
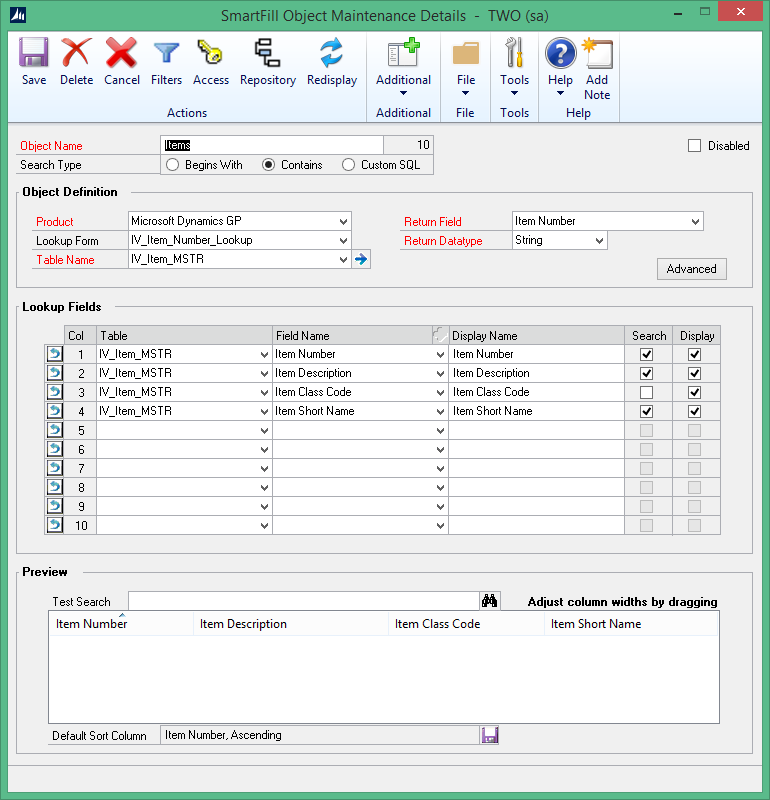
- Select the Items Object, and then click the Edit Object button. Here is a screenshot of a sample Items object:
-
- Click the Table Name field expansion button.
- In the SmartFill Object Secondary Tables window, click the Add Secondary Table button.
- In the SmartFill Tables window, find and select the IV_Item_MSTR_QTYS table, and then click Select.
- In the SmartFill Object Link window:
- Select the Item Number under the IV_Item_MSTR table.
- Select the Item Number under the IV_Item_MSTR_QTYS table.
- Click Link.
- In the SmartFill Object Secondary Tables window, click OK.
- In the SmartFill Object window, in the Lookup Fields section and on the next available row:
- Select Calculated Field in the Table column.
- Select New Calculated Field in the Field name column.
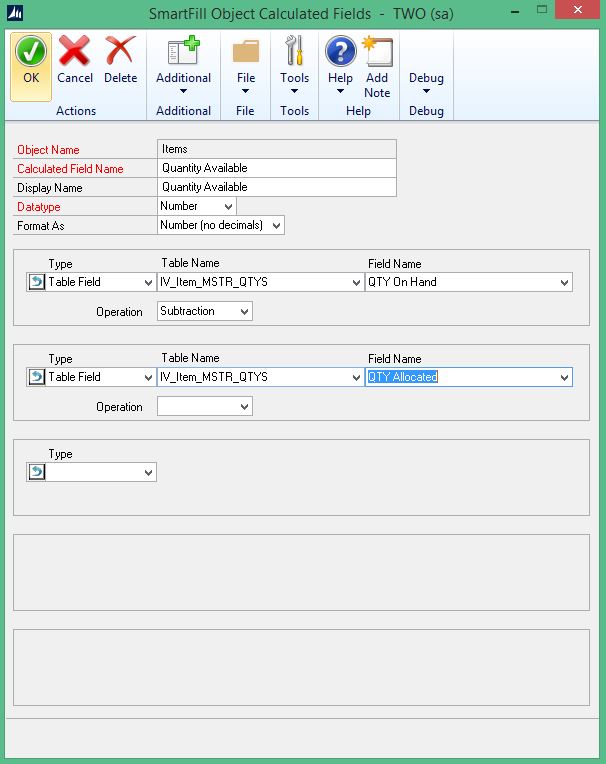
- In the SmartFill Object Calculated Fields window:
- Type Quantity Available in the Calculated Field Name field.
- Type Quantity Available in the Display Name field.
- Select Number for Datatype.
- Select Number (no decimals) for the Format As field.
- In the first Type field, select Table Field.
- In the first Table Name field, select IV_Item_MSTR_QTYS.
- In the first Field Name, select QTY On Hand.
- In the first Operation field, select Subtraction.
- In the second Type field, select Table Field.
- In the second Table Name field, select IV_Item_MSTR_QTYS.
- In the second Field Name, QTY Allocated.
- Click OK. Here is a screenshot of what the Calculated Field looks like:
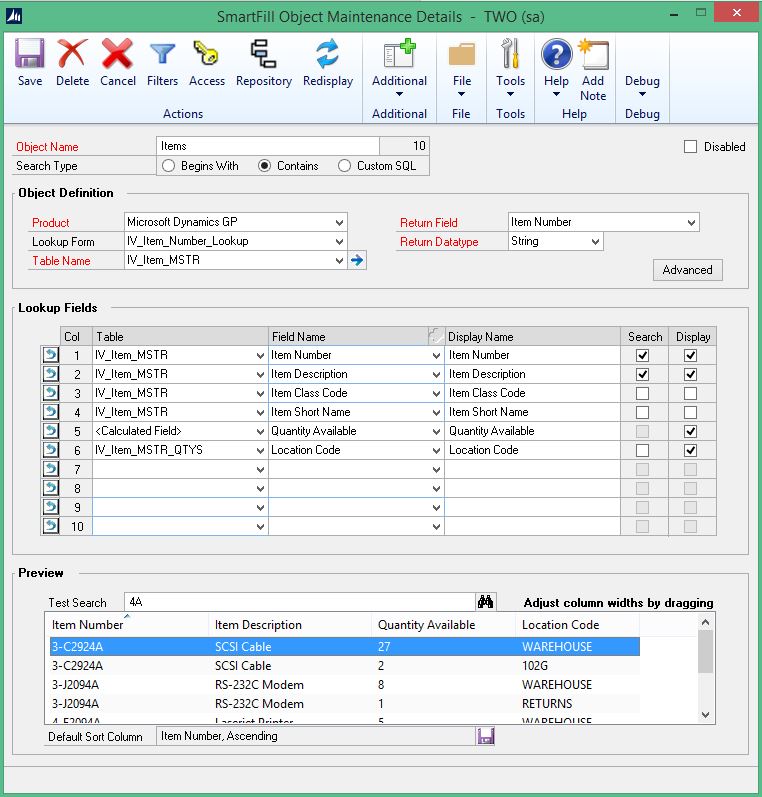
- In the SmartFill Object Maintenance Details window, mark the Display checkbox for the Quantity Available Lookup Field. Then add the Location Code field form the IV_Item_MSTR_QTYS table. Here is a screenshot of what the Items Object looks like after adding the Quantity Available field:
- Click Save.
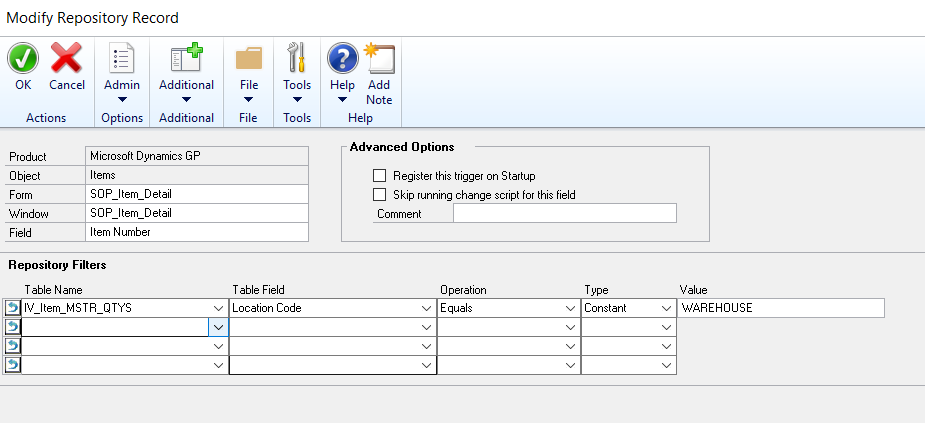
Note: If you would like only the Site IDs where the Quantity Available is greater than zero to be displayed, you can modify the Repository record for the specific Window and Field. For example: