Subject:
Describes how to create a SmartFill Object and how to assign it to a non-lookup field in Microsoft Dynamics GP. In this example, Payroll Transaction History records is used.
Resolution:
Create the SmartFill Object
- Log into Microsoft Dynamics GP as sa.
- Go to Microsoft Dynamics GP | Tools | Setup | SmartFill | Objects.
- Click New (+) to create a new SmartFill Object.
- In the SmartFill Object Maintenance Details window, enter the name of the SmartFill Object. In this example, it is Payroll Trx Hist.
- In the Search Type field, select Contains.
- In the Object Definition section, select the records pertaining to your object. Here we will select the following:
- Product: Microsoft Dynamics GP
- Lookup Form: uprTransactionsLookup
- Table Name: UPR_Transaction_HIST
- Return Field: Check Number
- Return Datatype: String
- In the Lookup Fields section, enter the fields you want to use to search or display.
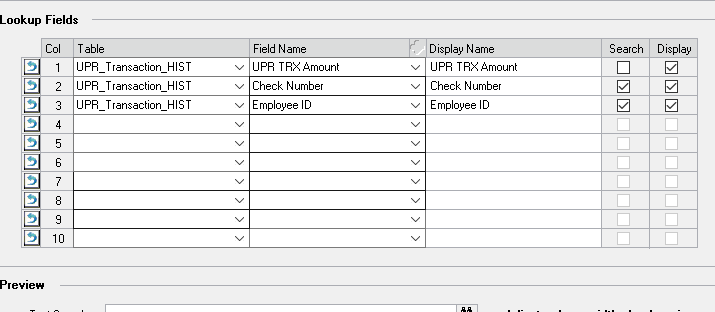
- Mark the Search checkbox for any fields you want to be able to search.
- Mark the Display checkbox for all columns you want to appear in the Make a Selection window.
- Click Save.
Create the Repository record
- Make sure all windows are closed in Microsoft Dynamics GP.
- Go to Microsoft Dynamics GP | Tools | Setup | SmartFill | Repository.
- In the Repository Maintenance window, click New (+) to create a new record.
- In the Lookup Creation Wizard, select Payroll Trx Hist.
- Click Next.
- Open the window where you wish to add the Repository record. For example, Inquiry | Payroll | Transaction History.
- Change the Select By: option to Check Number.
- Put the cursor in the From field.
- When the Add New Lookup window is populated, click Add Lookup.
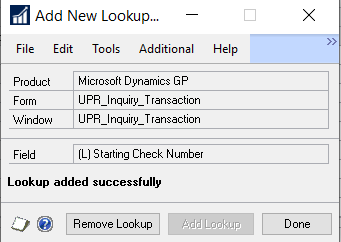
Note: If the Remove Lookup button is available, this means the field is assigned to a different object. Click Remove Lookup and click Yes when prompted to remove the field from the other object. Then click Add Object.
- Click Done.
- Close the Payroll Transaction Inquiry window.
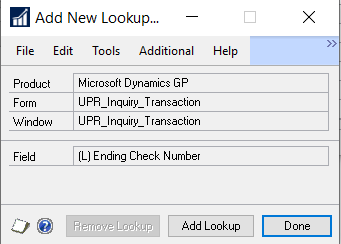
- Follow steps 3-11 again, but in step 8 place the cursor in the To field.
Add a Window Field Value Filter to the Repository Record
- Go to Microsoft Dynamics GP | Tools | Setup | SmartFill | Repository.
- In the Repository Maintenance window, select the following:
Product: Microsoft Dynamics GP
Object: Payroll Trx Hist - Select the record for the UPR_Inquiry_Transaction Form and (L) Starting Check Number field.
- Click Edit.
- In the Modify Repository Record window, enter the following Filter:
Table Name: UPR_Transaction_HIST
Table Field: Employee ID
Operation: Equals
Type: Window Field
Value: Employee ID
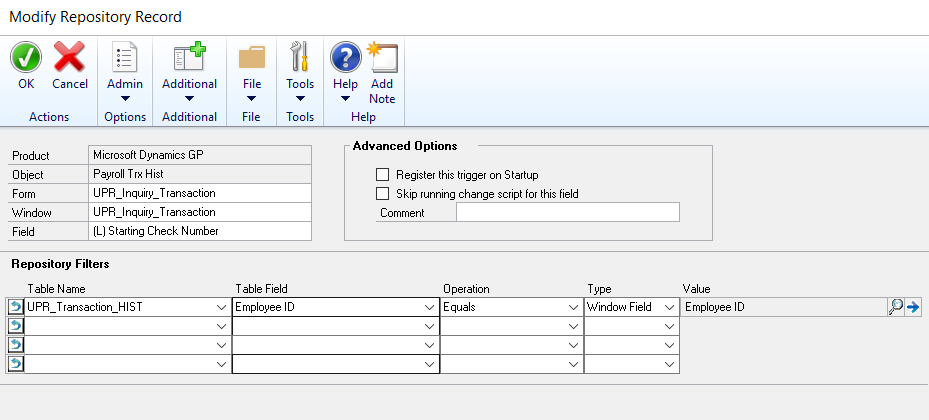
- In the Modify Repository Record window, click OK.
- In the Repository Maintenance window, click OK.
Note: If you would like to add a window field value to the Repository record created for the UPR_Inquiry_Transaction Form and (L) Ending Check Number field, repeat the Steps above for the (L) Ending Check Number field.
Using the new SmartFill Object
- Go to Inquiry | Payroll | Transaction History.
- Select the Employee ID.
- Change the Select By: field to Check Number.
- Enter part of the Check Number you need to find in the From: field, and then tab off the field.
- In the Make a Selection window, select the Check Number.